
What you need:
*red fleece
*black fleece
*black thread
*red thread
*sewing machine, or a needle, or both
*bean bag filling for your bugs (you can use actual dry small beans, or buy those little plasic pellet things in the doll making section at your local craft store)
*small, sharp "snippy" scissors
I am using fleece to make the bugs because it is soft, snuggly, and super easy to use since it doesn't fray. Start with an oval slightly larger than the size you want your finished ladybug to be, cut out two at the same time. Then cut a black piece the same size as your ovals.


Using ONE of your red ovals, lay it on top of your black piece, and draw out a ladybug using a sharpie.

Sew (using your sewing machine or hand sew) using your black thread on your lines...I drew a center line, do NOT sew on the center line!!! I just used it to get my dots even :)

This is what your bug shouldlook like on the red side once the lines are sewn. As you can see, I am terrible at sewing circles on a machine, but don't worry, the imperfections will be hidden!

Here is what the black side should look like....now take your scissors and cut around the black top of your bug, using the red as your guide, so that they very top of the head of your bug is curved.

Use your small sharp scissors to carefully cut around all of the lines you have sewn, leaving behind the head and your dots, and exposing the red underneath. (This is where you can make your lumpy circles look nice and round).

Now the top of your ladybug should look like this...(okay, so my spots are still lumpy...but none of the kids seemed to notice :)

Use your other red oval, and sandwich the black spots inside. Using your machine (or hand stitching) sew around the edge with the red thread, stop before you complete the oval leaving an opening.

Turn the bug right side out through the hole, then fill it up! You may wan to use a funnel if you are using the plastic bead things (definitely saves you a lot of clean-up!).

Once your bug is full, hand stitch the opening closed...and you have a ladybug beanbag!!
Good for throwing at your big sister...

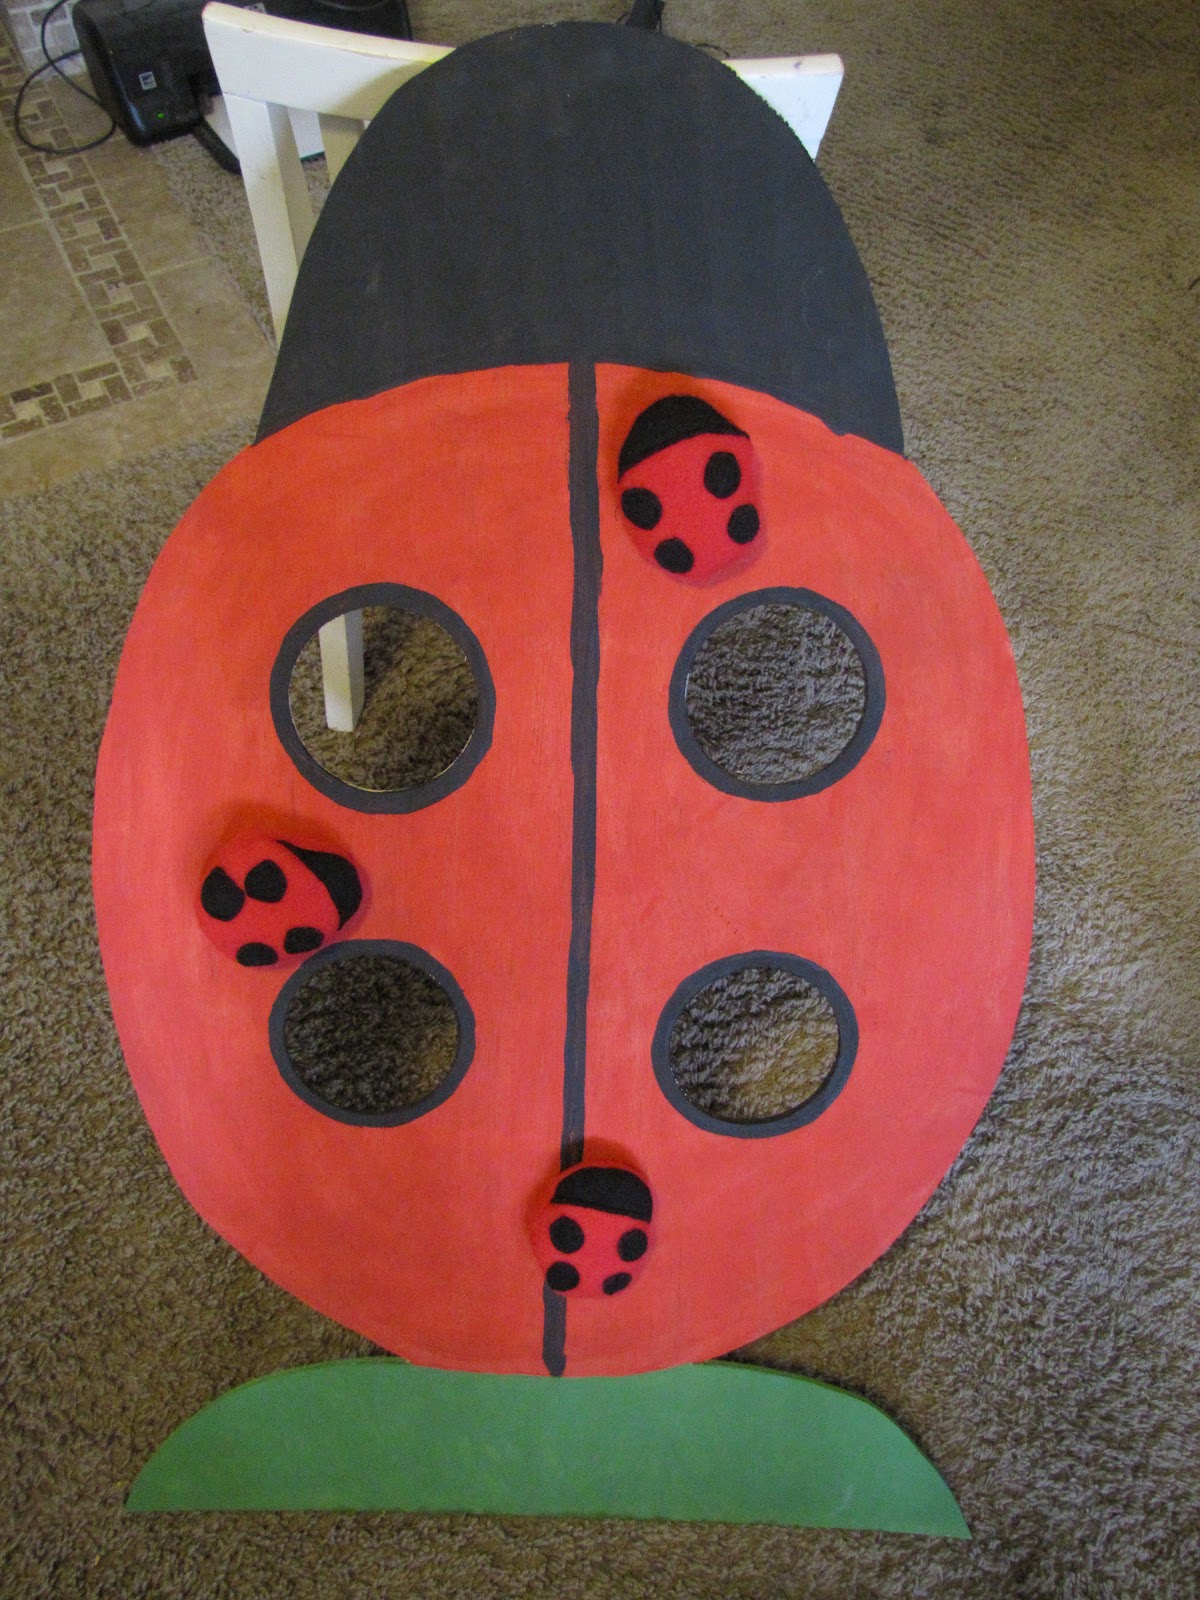
...Or you can make a nice ladybug board and play bean bag toss!

looks like as much fun to throw as make! Thank you for this will try it out this week x
ReplyDeletepopped in from sew many ways FaFF! Love love love the lady bugs!
ReplyDeletePs good job on the tutorial! very easy to follow
Deletegood work! I like it! :) and I like the new about me section ;) haha made me laugh!
ReplyDelete